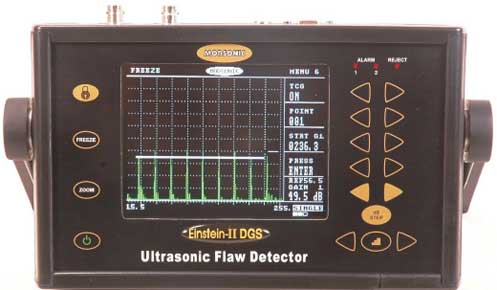
| Technical Specifications |
| Test Range |
10 mm to 5 meter (0.500 in to 200 in) (in steel). In Hot Key mode it has 13 preset values. Fine mode adjustable in step of 1mm (0.2 in). |
| Velocity |
1000 m/sec to 9999 m/sec (0.0400 in/s to 0.4000 in/s). In Hot Key mode it has 7 preset values. Fine mode adjustable in step of 1 met/sec (0.0001 in/s). |
| Delay |
Variable from 0 to 3000 mm (0 to 100 in). In Hot Key mode 5 mm (0.2 in).Fine mode adjustable in step of 0.5 mm (0.02 in). |
| Gain |
100 dB calibrated gain adjustable in 0.5, 1, 2, 6, 12 or 20 dB step. |
| Rejection |
0 to 100% FSH with LED indicator. |
| Rectification |
Full-wave rectified with filtering. |
| Frequency |
Broad Band amplifier 0.5 MHz to 15 MHz. |
| Test Modes |
Pulse echo and transmit/receive. |
| Transmitter |
Transmission pulse Negative spike with selectable high or low power. |
| Damping |
Damping high / low is selectable. |
| Freeze/Peak Freeze |
A- Scan Freeze and Peak Freeze available. In Peak freeze it holds echo dynamic pattern which is useful during angle beam probing to locate peak signal. |
| Connectors |
BNC and LEMO(Size 1) both are provided. |
| Monitor |
Dual gate adjustable in 1% of Screen width with Positive/Negative logic, Gate Expand modes. |
| Gate Expand |
Expands Range to width of the gate. |
| A-Scan memory |
200 Trace Patterns can be stored (with Note/Detail) recalled, printed or transferred to PC via RS-232 serial port. |
| Calibration Set-up |
50 different calibration set-ups can be Stored and Recalled. |
| Software |
EinSoft DGS Interface software for transferring A-Scan from Einstein-II DGS to PC is supplied. |
| Printer Attachment |
IBM compatible Printer having serial port can be directly attached to main unit for printing of stored A-Scan waveform with calibration data. |
| Display |
High brightness Colour LCD/TFT Display. Display area 320×240 pixel(122x92mm). Eleven different color scheme option. |
| Full Screen |
By pressing Zoom keyA-Scan can be displayed in Full Screen area. |
| ReferenceA-Scan |
Reference A-Scan pattern of standard test object can saved and recalled in the background for easy comparision during testing. |
| DAC |
Dynamic DAC curve can be Digitally plotted on screen with -6dB and -14dB DAC curves. DAC curve can be set as flaw monitor gate. Using minimum 2 to maximum 10 points DAC curve can be plotted. |
| DGS |
Defect size evaluation can be performed using 18 predefined probe settings and custom probe set-ups. Defect size is directly displayed in ERS value (Equivalent Reflector Size). |
| Digital Readout |
Thickness/Depth can be displayed in digital readout when using a normal probe and Sound path, Surface Distance and Depth are directly displayed when angle probe is in use. Measurement point can be selected to be Peak or Flank. Echo height, ERS value, dB diff of DGS curve to signle height, Echo height w.r.t. DAC can be measured. |
| Measurement Unit |
Metric or British unit of measurement is selectable. |
| Video Output |
Composite video signal (PAL) output for connection to a TV. |
| PRF |
High or low PRF is selectable. |
| Update Rate |
50Hz. |
| Power |
Lithium-Ion Battery pack 14.4VDC, 4AH, gives 8 hours continuous operation from fully charged battery. |
| Charger |
Input Voltage 100 to 240 VAC. Charge status indicator is provided. |
| Temperature |
0 to 55° C. (For operation) |
| Size |
152 x 255 x 70 mm (HxWxD). |
| Weight |
2.3 Kgs. with Battery. |


